C++
PROJECT 1.3.1
Change colors
Part 1
For our projects we will use Microsoft Visual Studio application. It allows to create projects in different programming languages and on different platforms. Download and install Visual Studio on your Personal Compiuter.
Download Visual Studio >>>
If it is not Installed, we will need to download Extension "C++ Windows Forms for Visual Studio 2022 .NET Framework. Here are the instruction:
Open Visual Studio. Create any project. Click Extensions on the meniu panel. After Click manage Extensions. New window will open. In the search write C++ forms. Select "C++ Windows Forms for Visual Studio 2022 .NET Framework" from the list and click download.
After closing Visual Studio you will get the message. Click Modify  to install the extension.
Open Visual Studio. Click Create a new project
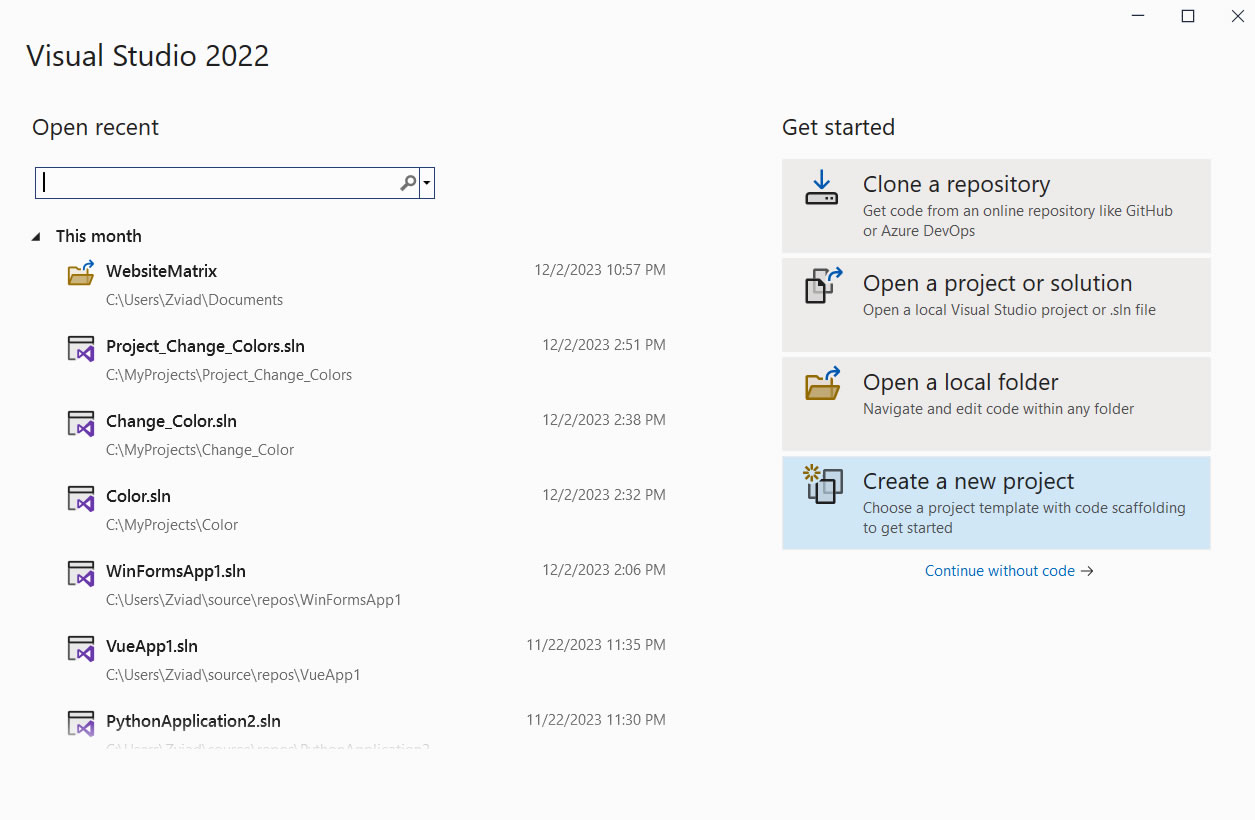
From The first Lists choose All languages . From the second All platforms , from the third All project types.
Click CppCLR_WinForms_project

In the first text line give the name of your project. We called our project Change_Color_By_C++. You can choose the project adress on your PC from the secund line. Click Create.

Now we are in Visual Studio programming environment In the window Solution Explorer expand Header Files. and click Form1.h now we can see our form for the Desktop app.

Initially we have to create app interface and add programming code to it.
From the Toolbox panel choose the Button, click on it, hold mouse button in click position and drag-and-drop button on the form. You can change button position and size using the mouse. (if you don't see the Toolbox panel click View on Meniu panel and find it there).

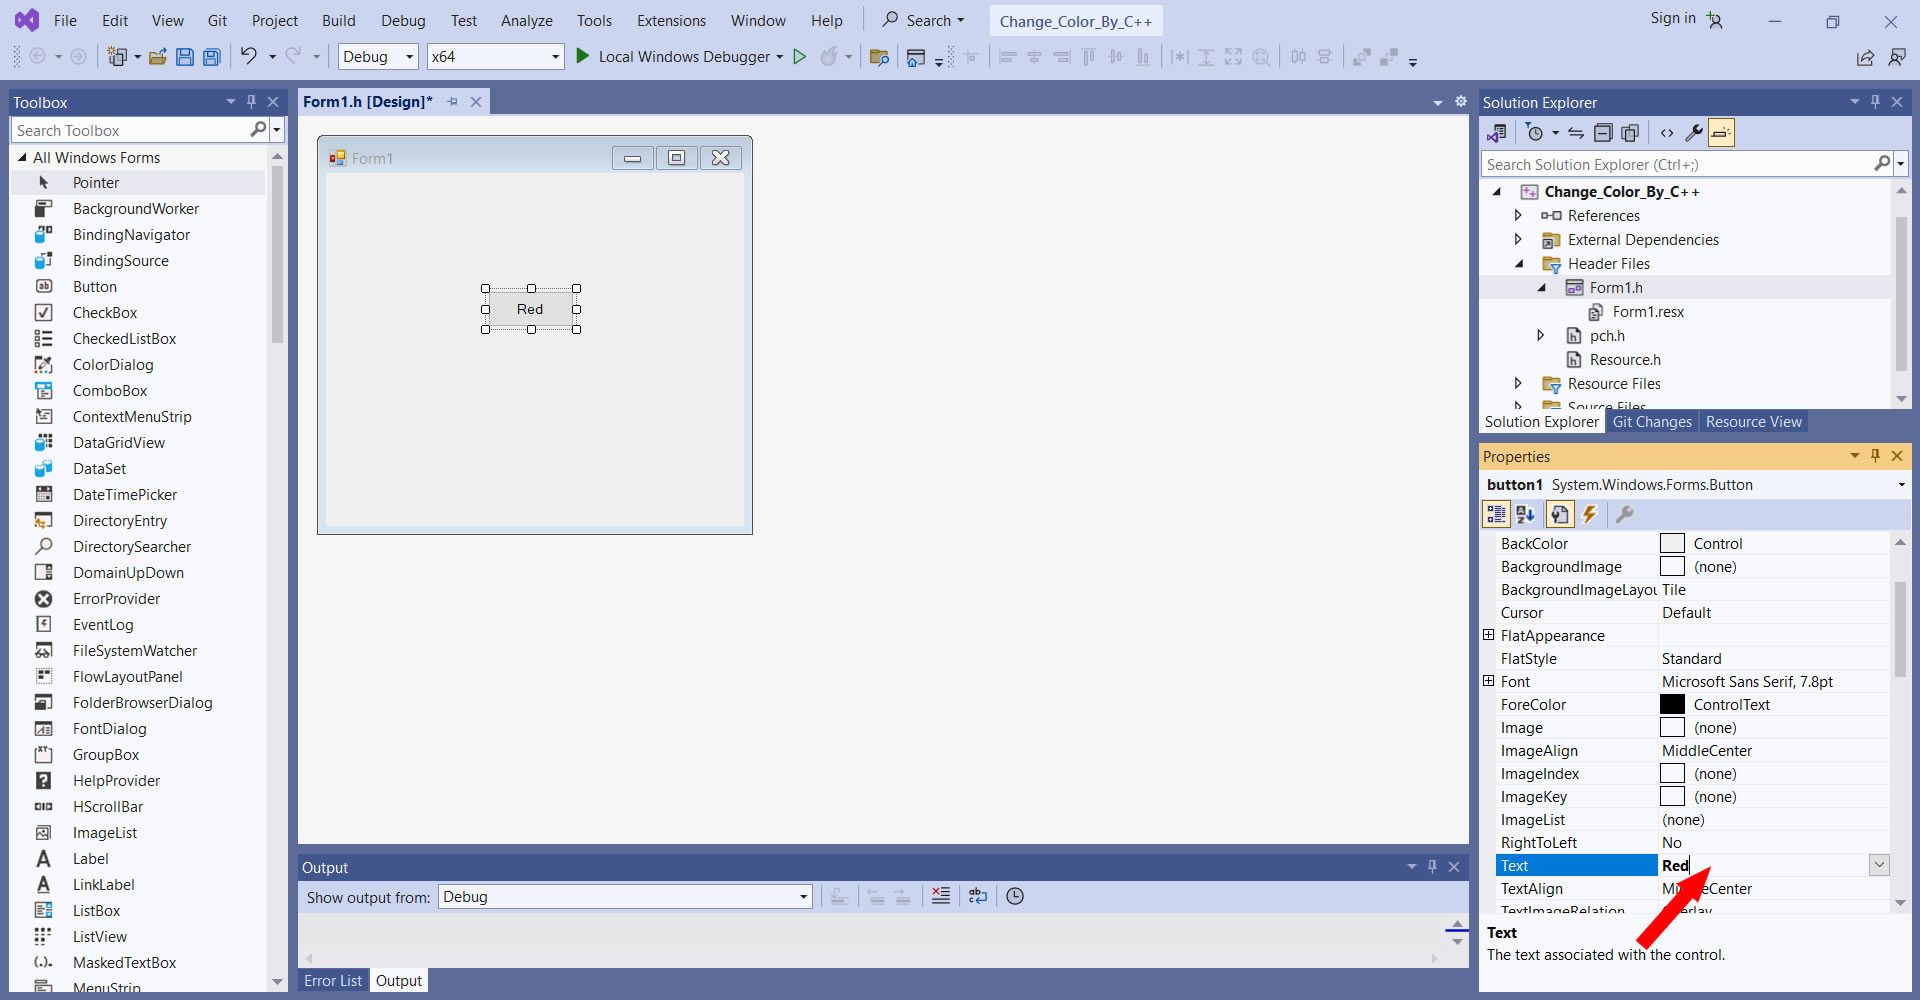
Now let's change text on the button (initially will be Button1). Select the Button, in the Properties windows find the property Text and change its value it to the "Red". (If you don't see the properties Window Right click on the button and find it from the context meniu)
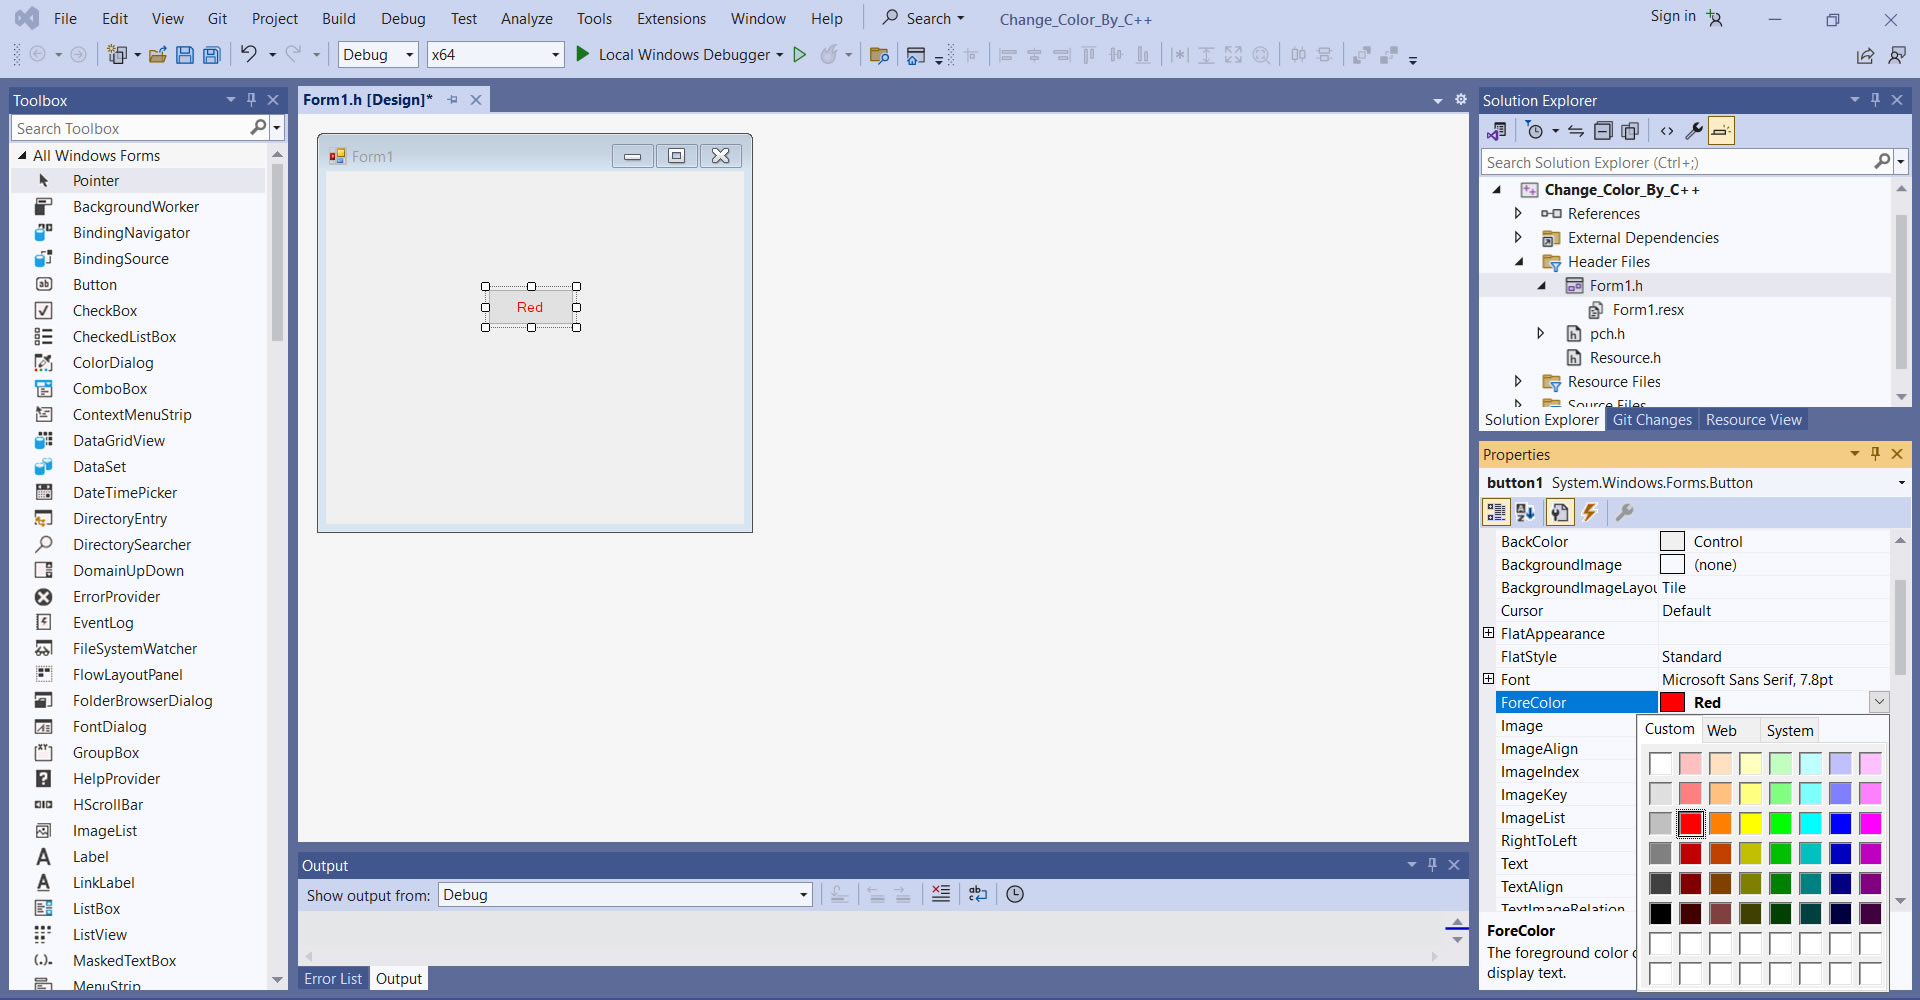
Let's change Button text color to the red. select button, In the properties windows find ForeColor, click on his value and from the color pallette choose the red. To find the red click Custom on the color palette.
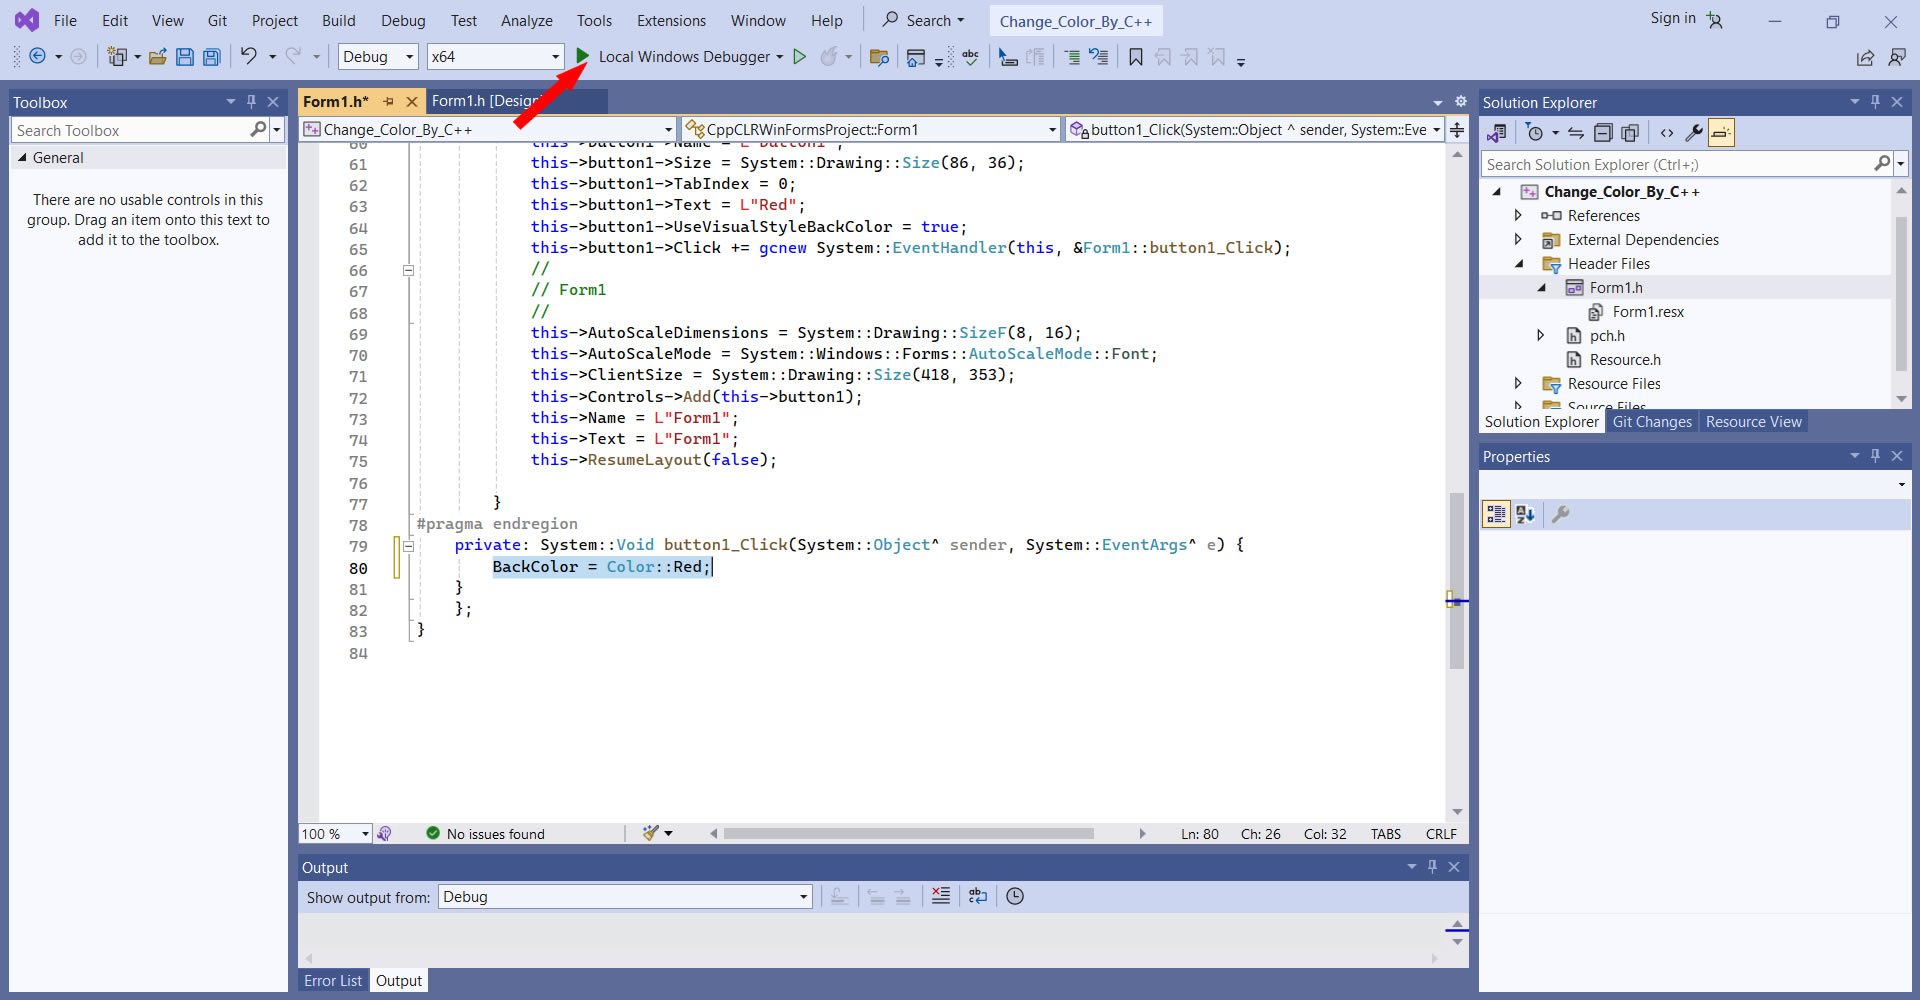
Now interface is ready. Let's start coding. Double click on the Button. The coding window will open. Do not change the code you see. We will explain them later. Just write the next code in the place where you see the cursor:
BackColor = Color::Red;
(Looks a little bit different then Visual Basic or C#. Don't forget ; symbol at the and of the operation.
(Visual Studio has a good context help that helps you not to make syntax mistake)
Run the application using the green triangle button on the meniu panel. See red arrow on the image.
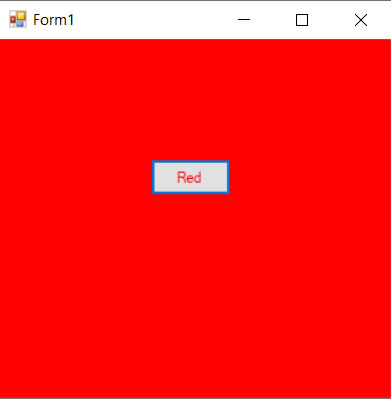
click the button Red. WOW! it works. Background color was changed to the red.
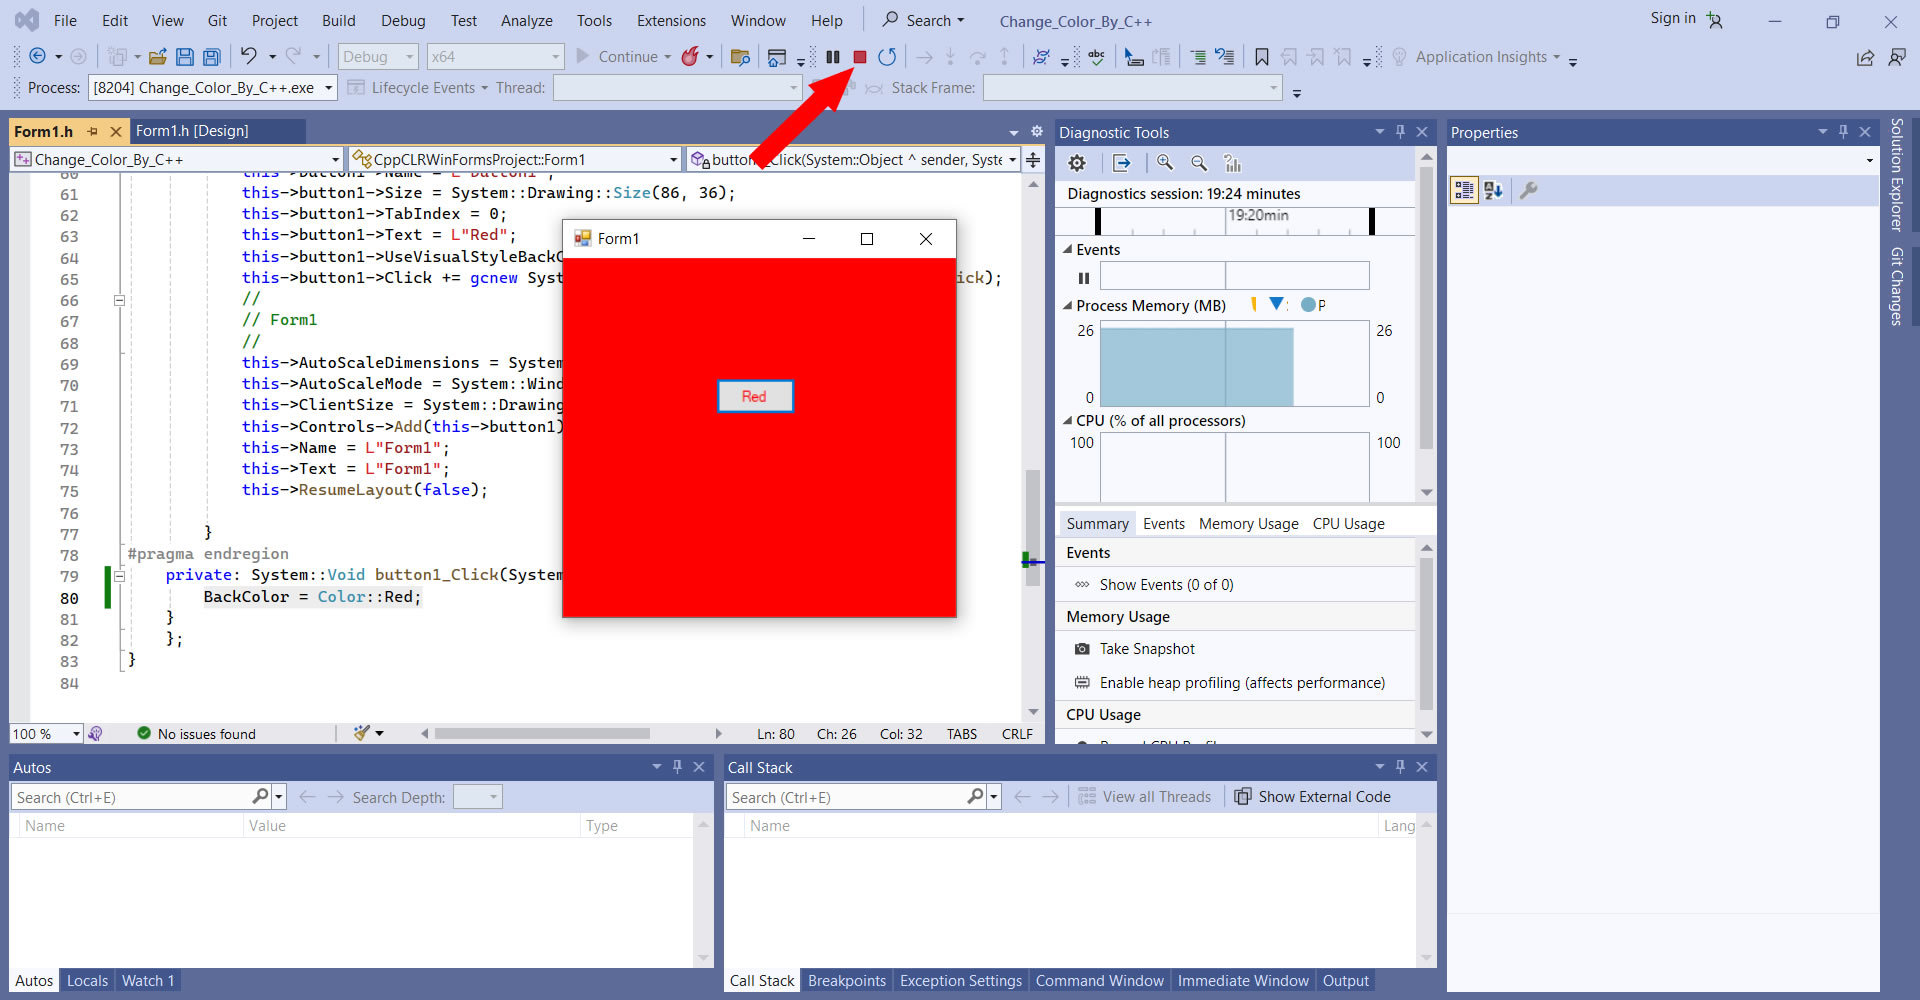
Now let's add other buttons that changes background color to the blue and black. Click the square button on the meniu pane, we will return to the programming space. See red arrow on the image.
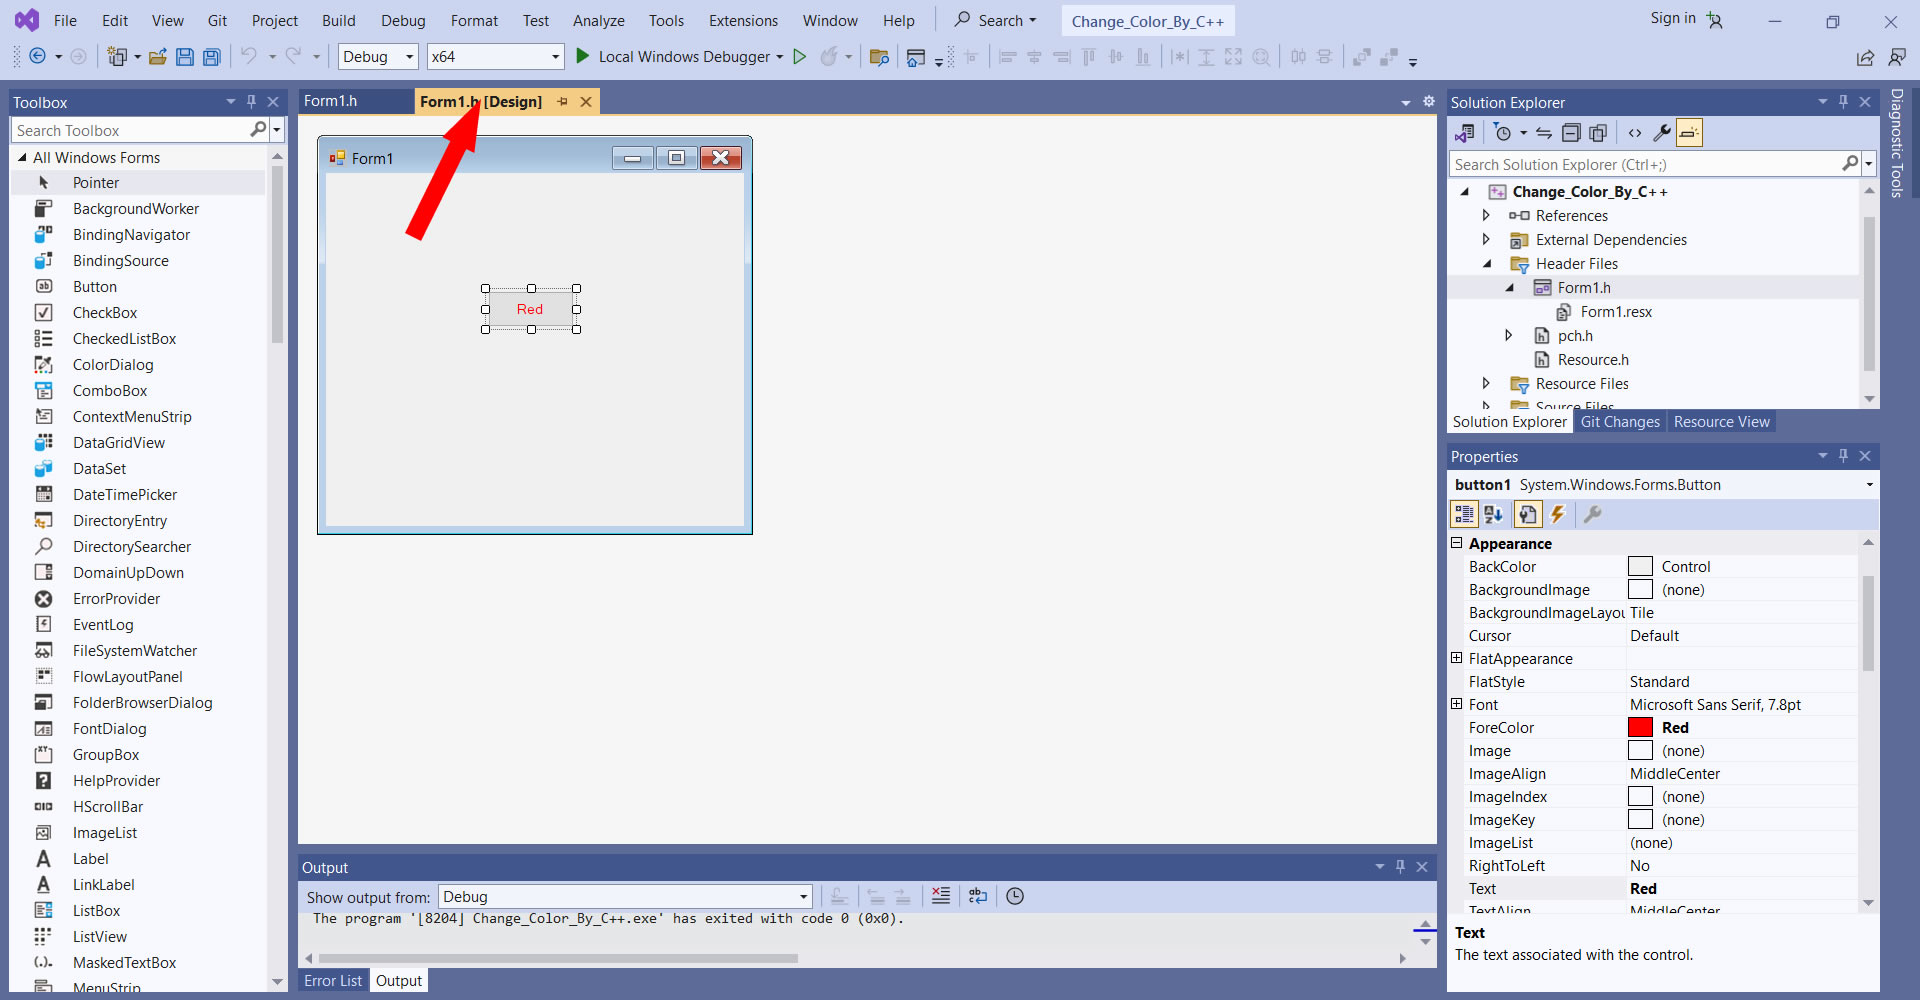
Click the tab shown by red arrow to see your form.
Add two more buttons. change their text to the Blue and Black. change text colors from the Properties window.
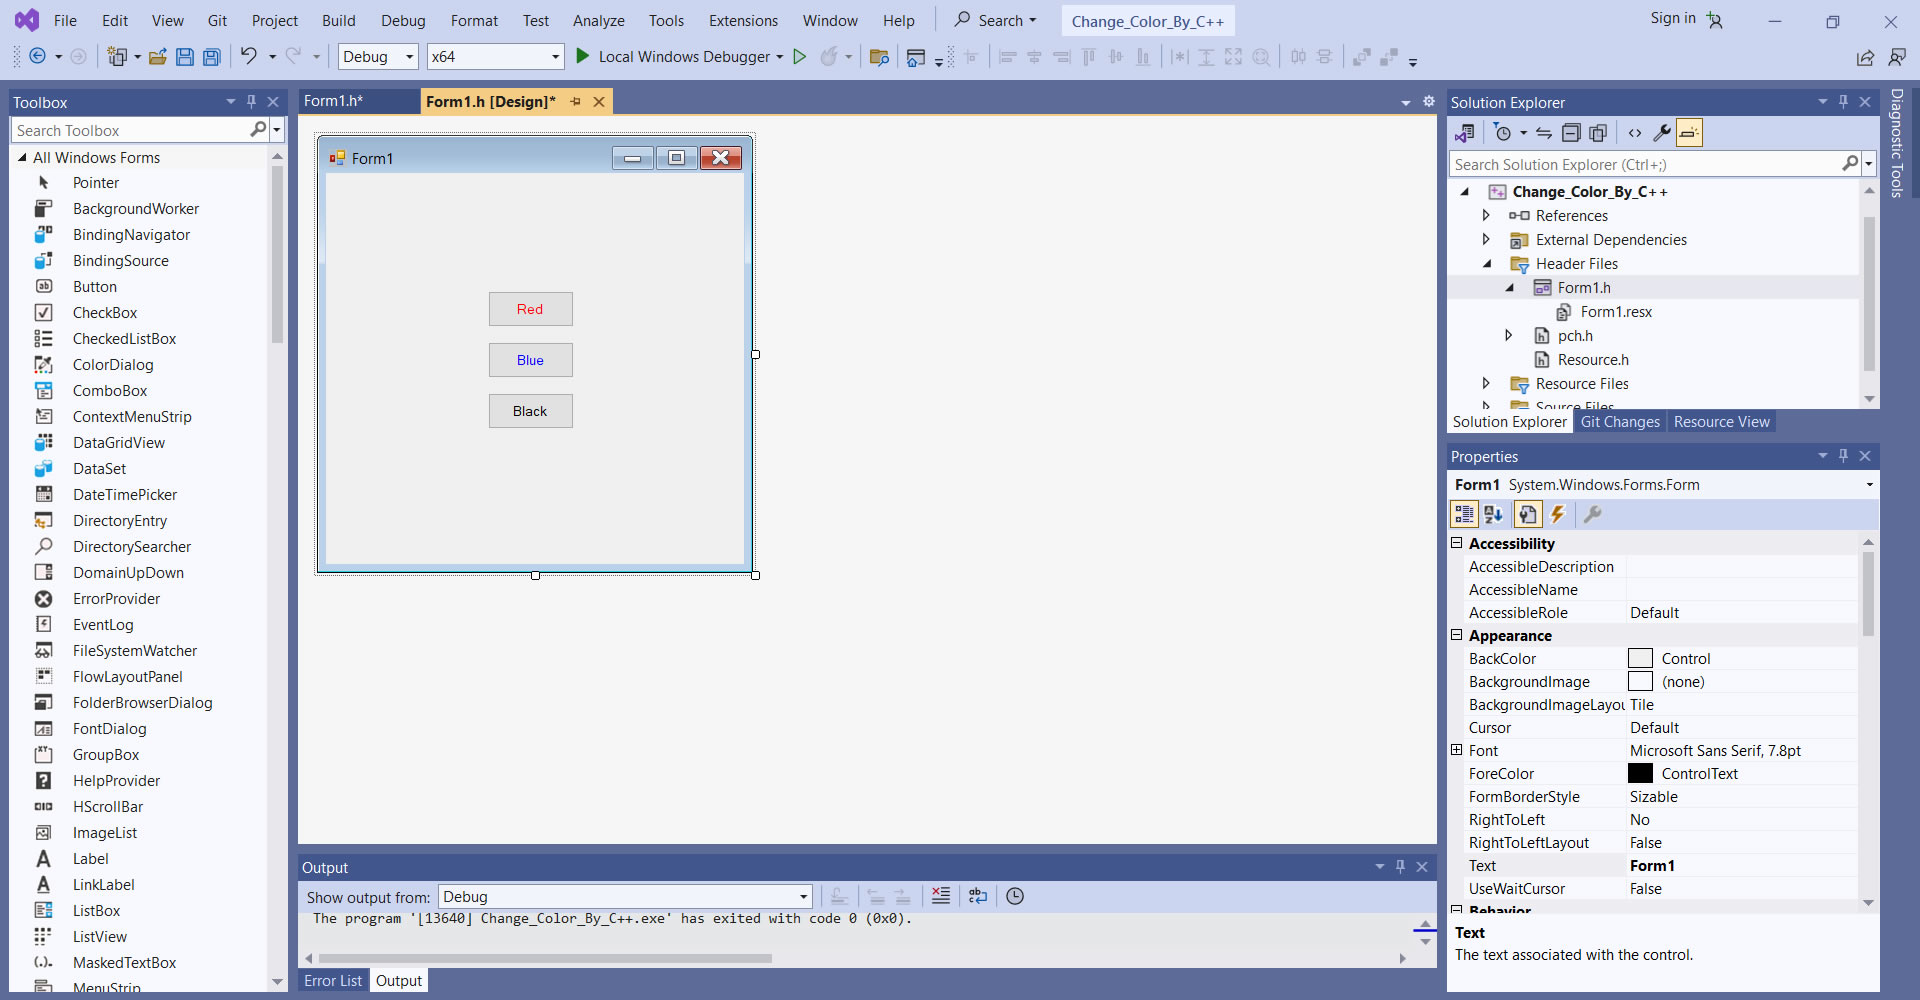
Double click the button Blue and write the next code in the place where you see the cursor:
BackColor = Color::Blue;
Click the red square button on the meniu pane, we will return to the programming space. Double click the button Black and write the next code in the place when you see the cursor:
BackColor = Color::Black;
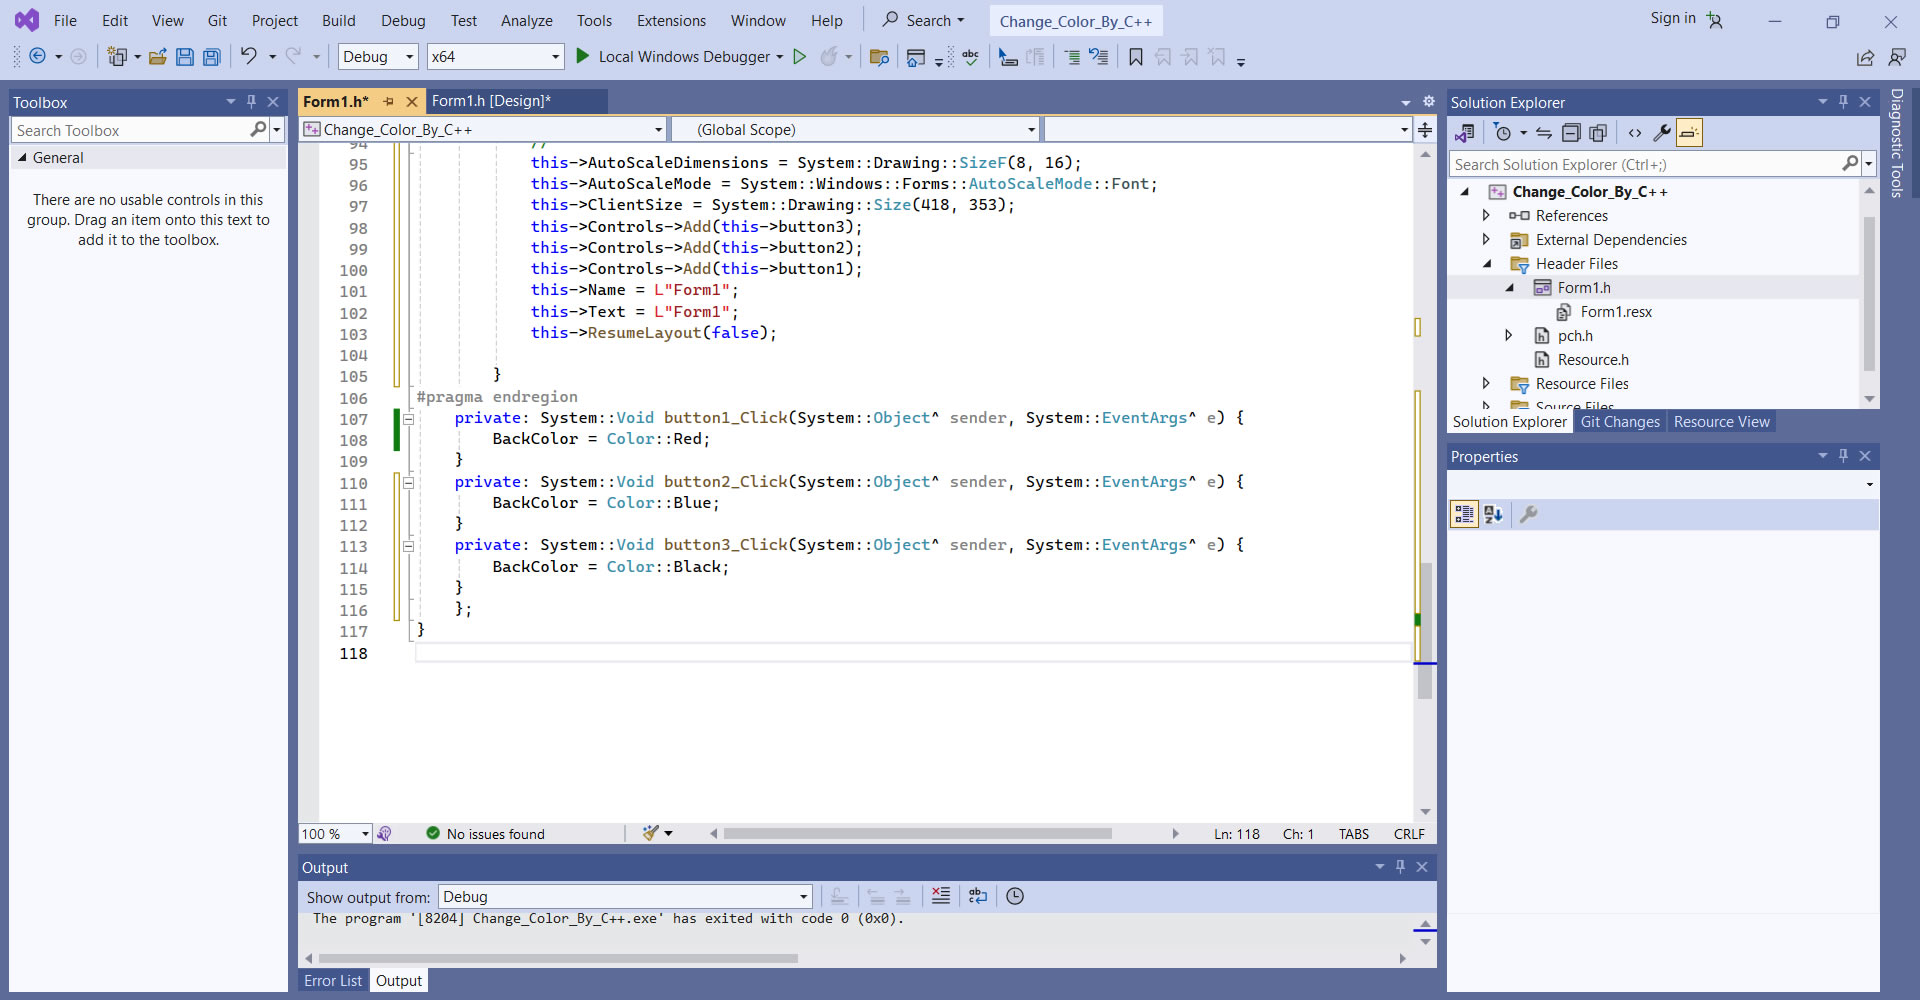
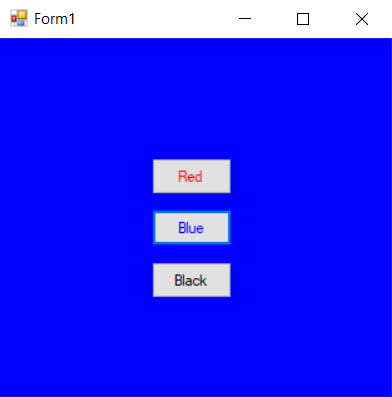
Run the application using the green triangle button on the menu panel. when app runs click the buttons. WOW! it works. Background color was changed to the red, blue and black!
Part 2
Now let's make our app more diinamic. We want to change the screen color based on text we will write in the textbox. If we will write "Red" Color must change to the red, If the "Blue" color must be blue and if "black" the screen must became black.
For this we have to learn most important operator of all programming languages.
if opeartor
Here is the C++ syntax for the if operator:
--------------------------
if ( condition) {
operation(s);
}
--------------------------
In the C++ code, condition is olways inside parentheses () and operation(s) inside curly braces {}.
Operation (s) ends with the ; symbol.
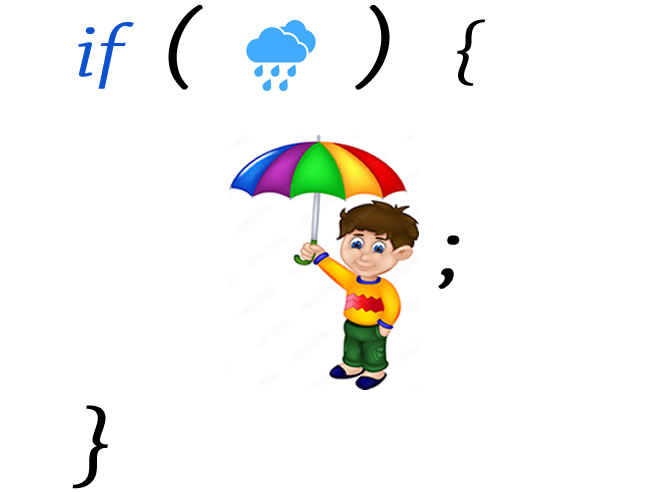
Let's look on this picture. here condition is the rain and operation - taking umbrella.
 :
:
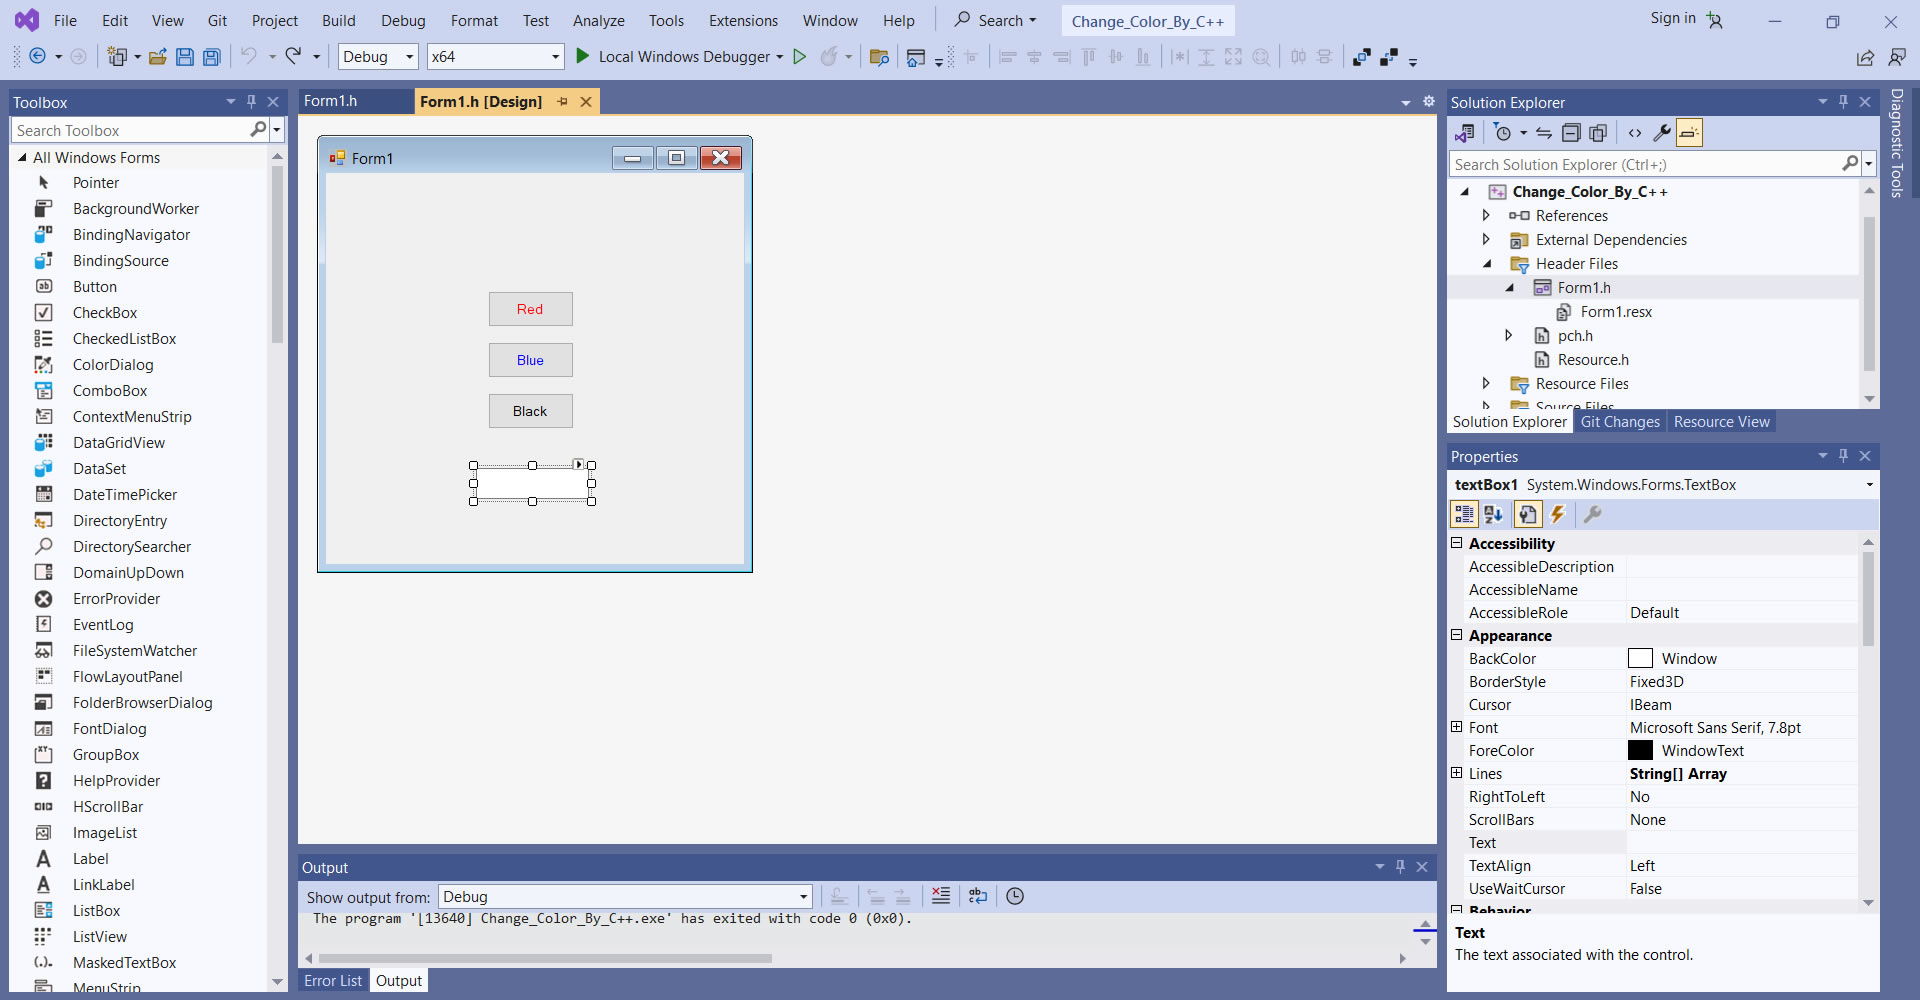
From the Toolbox window Drag-and-drope on our form TextBox Control.
Iinstead of point, after Controls name, to call its properties in C++ we are using -> and instead of = for comparation here we have ==
Button by initial settings, reacts to click. but the TextBoxt to the text change.
our texbox name is textBox1. It was initially given by Visual Studio. You can see name of the controls on properties window. If it needed User can change the name from this window.
Double click on TextBoxt to open programming code and write next code in de cursor's place:
Please use the Simulator to continue the tutorial...
Conclusion:
We have created an application in the Visual Studio environment. First, we have worked on the program interface (visual side), then we wrote the programming code using the C++ programming language.
Now let's see the difference between the first and second part of the project. In the first part, we have a linear algorithm, that is, the buttons always perform the same command. We need 3 buttons for three colors. For 100 colors we will need 100 buttons.
In the second part, we have only one text block and depending on what text we enter, the background color will change - the result depends on the input data.
You probably noticed that we went through similar stages when creating the same application in Visual Basic.and C#, In particular, working on the interface was the same process, we had a difference only in the programming code.